Step by step Drop Guide
The Guide will contain the following:
Step 1 (Setup)
Step 2 (Getting RAM)
Step 3 (Navigating to Drop Page)
Step 4 (Creation of the Drop)
*If there is any issues or questions regarding Drop creations you can ask your questions in our Telegram Group Chat! BiHutNetworks Telegram Group
The first thing we need to make sure is done is to have added atomicdropsx to be allowed to handle the mining of the NFTs that we are planning to drop.
This requires you to add atomicdropsx to be allowed to handle your collection that holds the NFTs that you want to create a drop with!
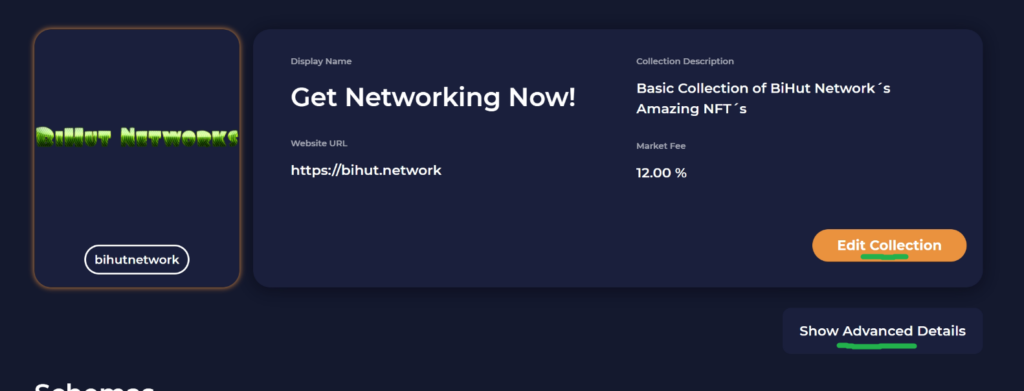
On AtomicHubs website we need to go to the collection and click Edit Collection and then press Show Advanced Details as shown with green markings in the picture above!
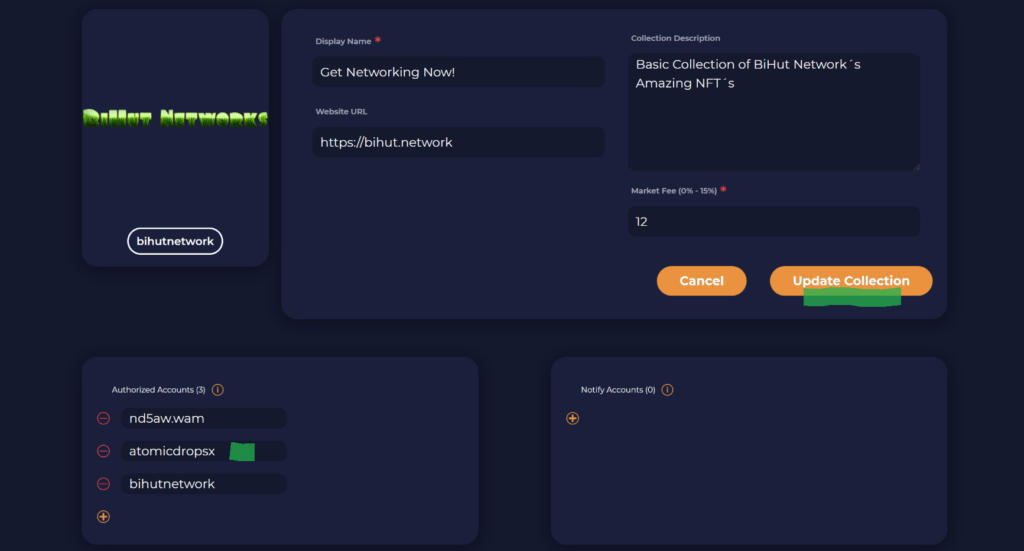
After that you will see this (picture above) where you need to press the yellow + sign down to the left and add atomicdropsx to that new line,
make sure that it’s spelled exactly like this otherwise we can come across some issues that we do not want. An example of how it looks can be viewed in the picture above with a green marking.
Then press Update Collection (green marking).
You can now move on to Step 2!
To be able to have the drop minted and to send out the NFTs you will need to send some WAX to the atomicdropsx account.
To do this we go to our favourite WAX wallet and send WAX to atomicdropsx.
We also need to make sure that we set the memo correctly so the wax gets sent to the right collections ram.
Here we write:
deposit_collection_ram:collectionname

Depending on the size and amount of NFTs you are planning on dropping is the amount of WAX needed. If you’re planning on doing more drops in this specific collection I would recommend starting sending between 2-4 WAX. This should last you a while!
Example picture above where wallet to send to and memo is shown above.
Green markings should not be changed but make sure
that you change the orange line where it sayscollectionname to your actuall collection’s name!
Send the transaction and make sure it’s sent.
Now you can move on to Step 3!
Now you can navigate yourself to wax.bloks.io and login to your account.
After doing that you should search for atomicdropsx.
After that you should make sure that the account name is atomicdropsx then press Contract
then Actions and then Finally press the createdrop button as showed on the picture below with green markings.

You can now move on to Step 4!
Now when we have made sure that the previous things are done we are ready to move on to create our amazing NFT Drop!
Below you will see the image of the createdrop page and below the image the fields and what to type will be explained.